In these kind of environments putting Lync Server into a resource forest makes the most sense. We can synchronize users from both forests into contact objects, and makes adding additional environments (more company purchase's) much more simplified.
In this post I am going to be going over how we can leverage FIM (Forefront Identity Manager) to synchronize user forest information into contact objects in the Lync resource forest. This method is recommended when you have multiple user forests and a ton (100s. 1000s, 10,000s) of users.
Guide Topology Overview
NOTE: The purpose of this Guide is to demonstrate the configuration of FIM for the use of user synchronization using Lync Server 2013 in a multiple forest configuration. It does not provide best practices on SQL, Windows or Lync configuration(s) or sizing.
The Forefront Identity Manager Server in this post will be running Windows Server 2008 R2 SP1. Also note that SQL is required for FIM, I installed SQL 2008 R2 on the FIM Server and will leverage that.
I have 3 forests total
LMLAB-A.COM = User Forest
LMLAB-B.COM = User Forest
LYNCMEBLOG.COM = Resource Forest (Lync 2013 Standard Edition)
More information on creating trusts (http://technet.microsoft.com/en-us/library/cc816590(v=ws.10).aspx)
Forefront Identity Manager prerequisites
Windows Server 2008 R2 SP1
SQL Server 2008+ (To install the FIM DB)
.NET FrameWork 4.5 (This is required to run the Lync FIM extensions)
Step 1: Forefront Identity Manager 2010 R2 Installation
Insert/Mount the FIM installation media, and open the FIMSplash.htm file and click "Install Synchronization Service"
Once the installer launches, click Next and accept the terms.
Specify your SQL Server and Instance name.
Click Next until installation begins, and wait for completion.
Download the Lync Server 2013 ResourceKit Install it into the default directory. Once the Resource Kit is installed go to %Program Files%\Microsoft Lync Server 2013\ResKit\LcsSync folder and copy all contents into the %Program Files%\Microsoft Forefront Identity Manager\2010\Synchronization Service\Extensions folder on the FIM Server.
Edit the lcscfg.xml file as shown below. NOTE: The “lcsma name”
you choose here must be used when importing the Central Forest MA into FIM as demonstrated in Step 5.
Step 3: Extend Metaverse Shchema for Lync Attributes
Next, we need to extend the metaverse schema so the Lync Server attributes can be synchronized.
Open the “Synchronization Service Manager”, Click Metaverse Designer, at the top click Actions and “Import Metaverse Schema”. Select the Lcsmvschema.xml from the %drive letter%:\Program Files\Microsoft Identity Integration Server\Extensions\ folder where you imported the LcsSync files.
Next, click Tools -> Options, Select “Enable metaverse
rules extension”, then click Browse. In the list of files, select lcssync.dll
Next select “Enable Provisioning Rules Extension”. Then
click OK to close the Options window.
Step 4: Configure Object Deletion Rule
If a user object is deleted in a user forest, the corresponding contact object that is used by Lync Server in the recourse forest must also be deleted, a big reason why this is a favourable configuration in large organizations.
In the Synchronization Service Manager, click Metaverse Designer. Under the Object types right click person, on the right hand side in the Actions menu click "Configure Object Deletion Rule"
In the Synchronization Service Manager, click Metaverse Designer. Under the Object types right click person, on the right hand side in the Actions menu click "Configure Object Deletion Rule"
In the Configure Object Deletion Rule dialog box, click Rules Extension, then click OK.
Step 5: Create Lync Resource Forest Management Agent
Now we are ready to create the Management Agents that will synchronize the objects from the LMLAB-A forest to the Lync resource forest LYNCMEBLOG.COM
Click Management Agents at the top, which should bring you at a blank management agent screen. At the top click Actions, Import Management Agent.
Make your way to the extensions folder where you copied the LcsSync directory (%drive letter%:\Program Files\Microsoft Identity Integration Server\Extensions\) and import the "lcscentralforestma.xml" file and click Ok.
A new window will open "Create Management Agent" with a default name "Lcs Central Forest". This name must be the lcsma name you specified in Step 2.
Once you click Next, you will see the connect to Active Directory screen. Replace all the FABRIKAM information with your Lync resource forest information, and click Next.
On the next screen is where we match the imported template partition with our partition of our Lync resource forest. Click the FRABIKAM partition on the left, then click your root partition from the left and click Match.
Next, click Deselect for the other partitions in the list. Until you deselect everything you will not be able to click Ok at the bottom. then click Ok.
Next window will allow you to specify a specific domain controller and OU level filtering.
To select the OU you wish to put your synchronized contact objects click Containers
To select the OU you wish to put your synchronized contact objects click Containers
In the select containers window select the OU you wish to have your synced objects reside. then click OK.
At this point we are done with the configuration of the Management Agent, the rest has already been configured by Microsoft, you can click Next and accept all the defaults to the end, and click Finish.
Notice on the bottom screen (Configure Extensions) the Rules extension name has already been populated to lcssync.dll which we defined in Step 3.
Step 6: Create User Forest Management Agent
This step of creating the User Forest MA is the same at the previous step, except we are just defining our User Forest (LMLAB-A.COM) instead of our Lync Forest (LYNCMEBLOG.COM)
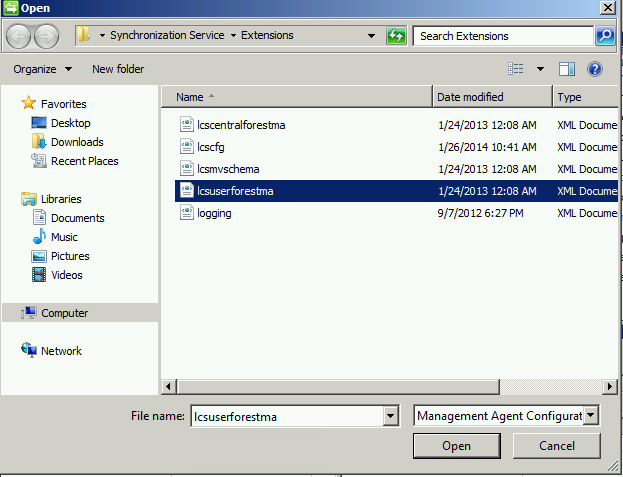
This time we will select "lcsuserforestma.xml", then click Open.
For the name of the Management Agent can be anything, it does not tie into any other configuration. But I will advise to keep the names as the forest. Only because once you start adding more User Forest Management Agents, it starts to get confusing if you don't have a common naming convention.
Next window we will enter in our User Forest Active Directory information, then click Next.
The same can be done on the next window for Partition Matching. Match your existing root partition with the one already defined for NWTraders as we did in step 5. Then deselect the other partitions in the list so we can click OK.
This next step is an important one, this is where you will select the OU(s) where your current enabled users reside. Click Containers and select all the OU(s) that contain users that you wish to Lync enable.
Once you have selected all the OU(s) you wish to synchronize, click OK to close the container selection window, then click Next on the directory partitions window.
Again at this point everything else is preconfigured, we can click Next all the way to the end, then click Finish.
ERROR: While clicking next through the "Configure Attribute Flow" you might receive an error
'msExchUserHoldPolicies' of 'inetOrgPerson' is no longer available.
In order to get past this you will need to remove the attribute flow for msExchUserHoldPolicies
Expand "Object Type: inetOrgPerson, select msExchangeUserHoldPolicies and click Delete at the bottom.
And do the same for Object Type: user, select msExchangeUserHoldPolicies and click Delete at the bottom.
Now you can click Next to the end, then click Finish.
In the Management Agent window you will now see your Lync Forest Agent and your User Forest Agent(s). I went ahead and added LMLAB-B.COM but the process is the exact same for adding multiple User Forest Agents as defined in Step 6.
Step 7: Importing, Synchronizing and Provisioning
Here is a quick drill down of the Import, Synchronization and Provisioning in Step 7
#1 Lync Forest - Right click Lync Forest Management Agent, Click Run -> Full Import
#2 User Forest - Right click User Forest Management Agent, Click Run -> Full Import
#3 Lync Forest - Right click Lync Forest Management Agent, Click Run -> Full Sync
#4 User Forest - Right click User Forest Management Agent, Click Run -> Full Sync
#5 Lync Forest - Right click Lync Forest Management Agent, Click Run -> Export
This is the last step in synchronizing your user objects to the Lync Forest.
NOTE: During the import, synchronize and provisioning I am starting with the Lync Forest first, this is a requirement. If you do this in any other order the objects will not synchronize and provision correctly.
If we look at the Lync Resource Active Directory Users and Computers, and go to our OU that we specified in step 5 we have no users in that OU.
First we need to run a full import from the Lync resource forest and the user forest into the FIM connector space.
In the FIM Synchronization Service Manager, Management Agents, right click the Lync forest Management Agent and click Run...
In the Run Management Agent window, click Full Import then OK.
It should only take a few seconds to run, Refresh the agent by hitting F5, once its complete you will see to the left of the Management Agent the State of Idle. You will also see in the bottom left corder the Synchronization Statistics which will now have some values including Adds.
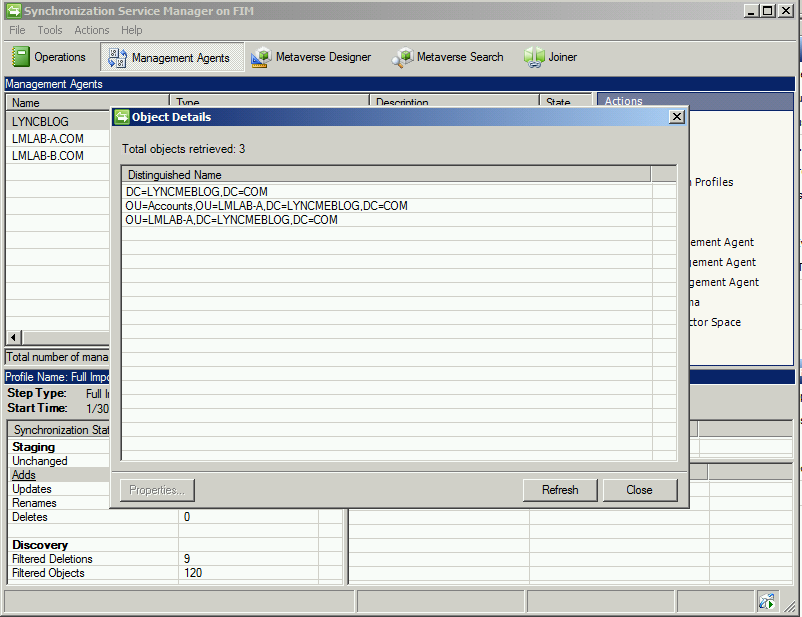
If you click Adds in the Synchronization Statistics box, you will see that the Distinguished Name of the OU you selected in step 5 has been added.
Next we will follow the same process for the User Forest Management Agent. right click the user forest Management Agent and click Run...
In the Run Management Agent window, click Full Import then OK.
It should only take a few seconds to run, Refresh the agent by hitting F5, once its complete you will see to the left of the Management Agent the State of Idle. You will also see in the bottom left corder the Synchronization Statistics which will now have some values including Adds.
If you click Adds in the Synchronization Statistics box, you will see the same user forest Distinguished Name's of the container and OUs that you specified. But now we also see the users that where in those OU(s).
Next we need to Synchronize the Metaverse with the data that was captured during the full import.
Right click your Lync forest Management Agent, and click Run...
Follow the same process but not on the User Forest Management Agent.
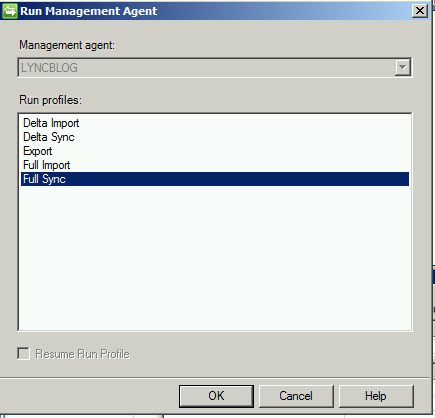
In the Run Management Agent window click Full Sync, and click OK.
And lastly we need to provision the Lync Resource Forest.
Right click your Lync forest Management Agent, and click Run...
n the Run Management Agent window click Export, and click OK.
In the Management Agents window in the bottom left corner "Export Statitics" click on Adds. Here you should see all the users that were in your User OU(s)
You can also confirm by looking in Active Directory Users and Computers in your Resource Forest OU you selected in step 5 and see the contact objects for your synchronized users.
Now our users from our user forest are synchronized as contact objects in the Lync 2013 resource forest. You can go ahead and enable these objects in Lync and test sign in.


